How can I update my (free) plugin?
For the health and safety of your site, we recommend creating regular backups of your site and database. This is especially important before installing, updating, or removing plugins. Learn more about the benefits of regular backups here.
Table of contents
Did you know that we have a Premium plugin too? Yoast SEO Premium can help you with everything related to SEO! For example, its advanced text analysis helps you write naturally flowing texts. The internal linking tool and the content filters make your posts easy to find. 404 errors become a thing of the past with the redirect manager. And, the social previews give you full control of how your posts appear on social media. Get it now!
How to update a Yoast plugin using the Updates Dashboard
Updating via the updates admin is the quickest way to update all plugins and themes in just a few clicks. We recommend backing up your site before running updates.
- Log in to your WordPress website.
When you’re logged in, you will be in your ‘Dashboard’.
- Click on ‘ Updates’

- Add a checkmark for each available Yoast plugin update.
On this page, you will see all of the items that your site has identified as needing to be updated. Scroll down to the Plugins section and put a checkmark next to the Yoast plugins.
- Click ‘Update Plugins’

How to update a Yoast plugin using the Plugins Overview
Updating via the plugin list is a safe and easy alternative to updating via the updates dashboard. We recommend backing up your site before running updates.
- Log in to your WordPress website.
When you’re logged in, you will be in your ‘Dashboard’. - Click on ‘Plugins’.
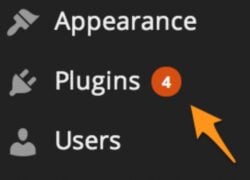
On the left-hand side, you will see a menu. In that menu, you may see a number next to ‘Plugins’ in the menu. This indicates the number of updates that are available for your plugins. If you see a number, click on ‘Plugins’. - Click ‘Update now’ for the Yoast plugin.
Review the plugin list and look for the plugin update notification. Click ‘update now’ to begin the update process. - Repeat for every plugin with an update notification.
Remove and re-install
- Log in to your WordPress website.
When you’re logged in, you will be in your ‘Dashboard’. - Click on ‘Plugins’.
On the left-hand side, you will see a menu. In that menu, you may see a number next to ‘Plugins’ in the menu. This indicates the number of updates that are available for your plugins. If you see a number, click on ‘Plugins’. - Click ‘Deactivate’ for the Yoast plugin.
Review the plugin list and look for the plugin you want to deactivate. Click ‘Deactivate’. - Click ‘Delete’ for the Yoast plugin.
Click the ‘Delete’ button to remove the plugin for your WordPress installation. Please know that all your settings will remain intact and will be restored after you install the plugin once again. - Download the plugin zip to your computer.
You can find the Premium versions of our plugin in your MyYoast account. Download the plugin files and save them to your computer. - Click ‘Add New’
The ‘Plugins’ settings will expand providing you additional options. Click on ‘Add New’. - Click the ‘Upload Plugin’ button near the top of the screen.
- Click the ‘Choose File’ button.
Browse to the folder where you saved the plugin download and select the plugin zip file. - Click ‘Install Now’.
This may take a while so be patient. - Click ‘Activate Plugin’
You will now have the latest version of your Yoast plugin installed with the exact settings it previously had.
How to manually update a Yoast plugin using FTP
If your WordPress admin doesn’t show the available update (which might happen due to a failure to communicate with a WordPress server) or if the automatic update doesn’t work, you may want to manually update your free plugin by using File Transfer Protocol (FTP) or preferably the secure version, Secure File Transfer Protocol (SFTP). If you are not sure how to do this your host provider may be able to help.
To manually update the plugin, you must have:
- Your FTP or SFTP login information
If you do not have this information, please contact your host provider and obtain your host (or IP address), Username, Password, and Port number. - An FTP or SFTP program
We use and recommend FileZilla but any FTP or SFTP program should work, including file managers provided by most web hosts.
Now that you have the required stuff, a manual update consists of downloading, unzipping, and uploading the plugin files. We recommend backing up your site before running updates.
- Download the plugin zip to your computer.
Go to the website of the free plugin, for example Yoast SEO. Download the plugin files and save them to your computer. - Extract the downloaded .zip file.
- Upload the extracted files to your plugins folder
Upload the extracted plugin folder to thewp-content/pluginsfolder in your WordPress directory online. The name of the extracted plugin folder should be equal to the name of the existing plugin-folder online.
NOTE: Make sure you overwrite the existing plugin-files. Doing so is not expected to result in the loss of Yoast data or settings on the site.
Another option is to remove and re-install the Yoast plugin. you can do this by following these steps.
Automatic updates in WordPress 5.5
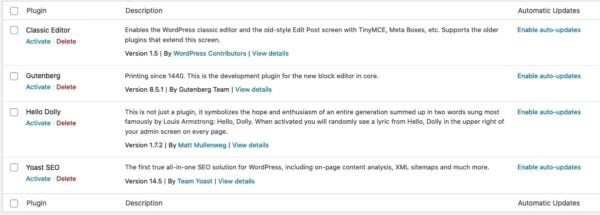
WordPress 5.5 offers the possibility to enable auto-updates for your plugins. Please note that if this is something you want to use, you have to enable it yourself for each plugin. Go to your admin dashboard, click on “Plugins” in your menu, and click “Enable auto-updates” next to every plugin you want to have automatically updated.

If you have Yoast SEO automatically updated, you will receive a notification on your dashboard. The notification will contain a short summary of the update and a link to the release post on yoast.com.

