Using the temporary login without password plugin
In this article, you’ll learn how to create a temporary login link and how to update the temporary login link. You might have to use this when asking our support team for help.
How to create a temporary login link
We try to minimize sending passwords via email because we value security and privacy. We’ve chosen the Temporary Login Without Password plugin to help us achieve this goal. With that plugin, it’s possible to create a special link with which we can log in without the need for a username and password. If you cannot install plugins, please create an admin user with the steps here.
- Install the plugin
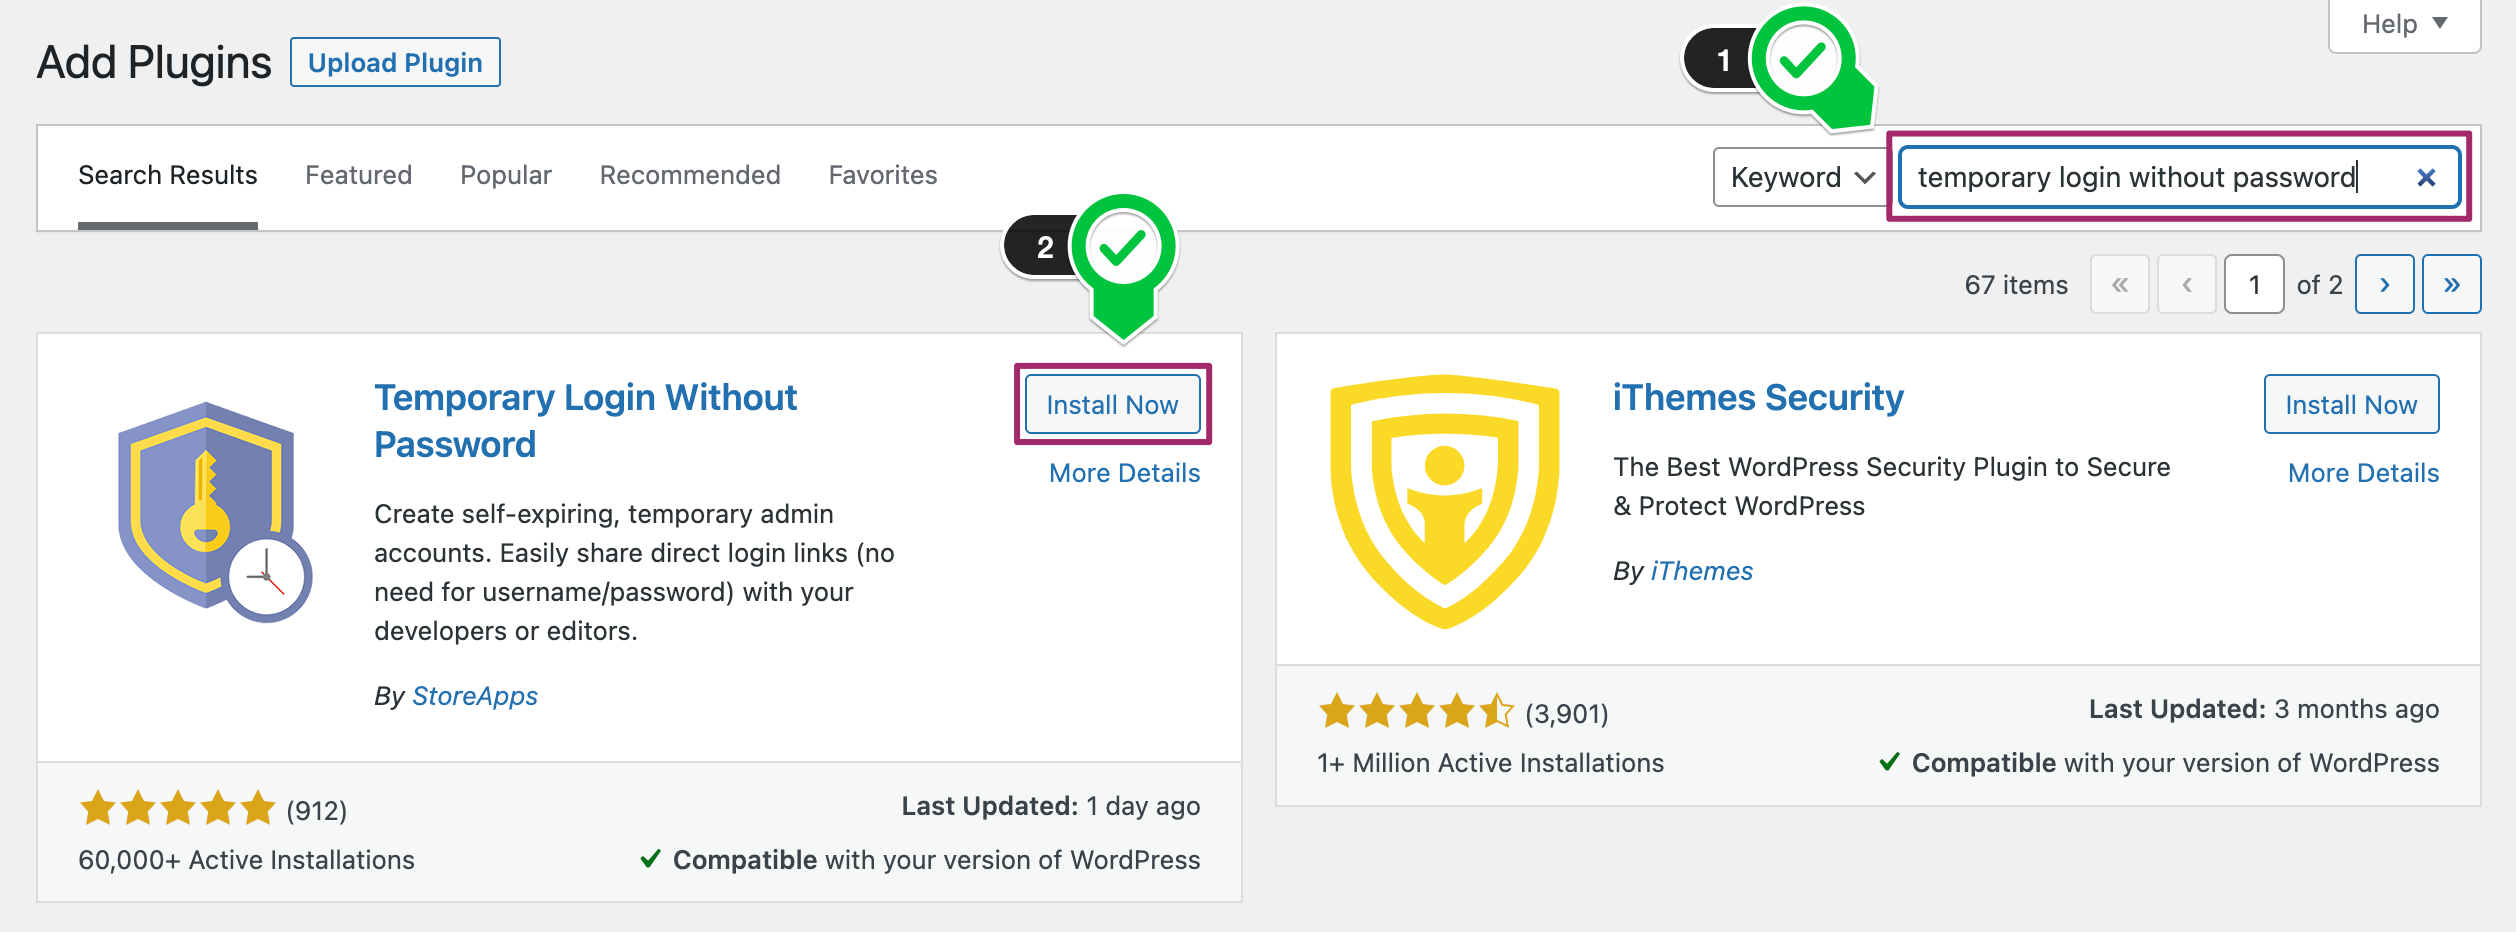
In your WordPress backend, go to Plugins -> Add new. Search for “temporary login without password” and click the “Install Now” button shown below.
- Activate the plugin
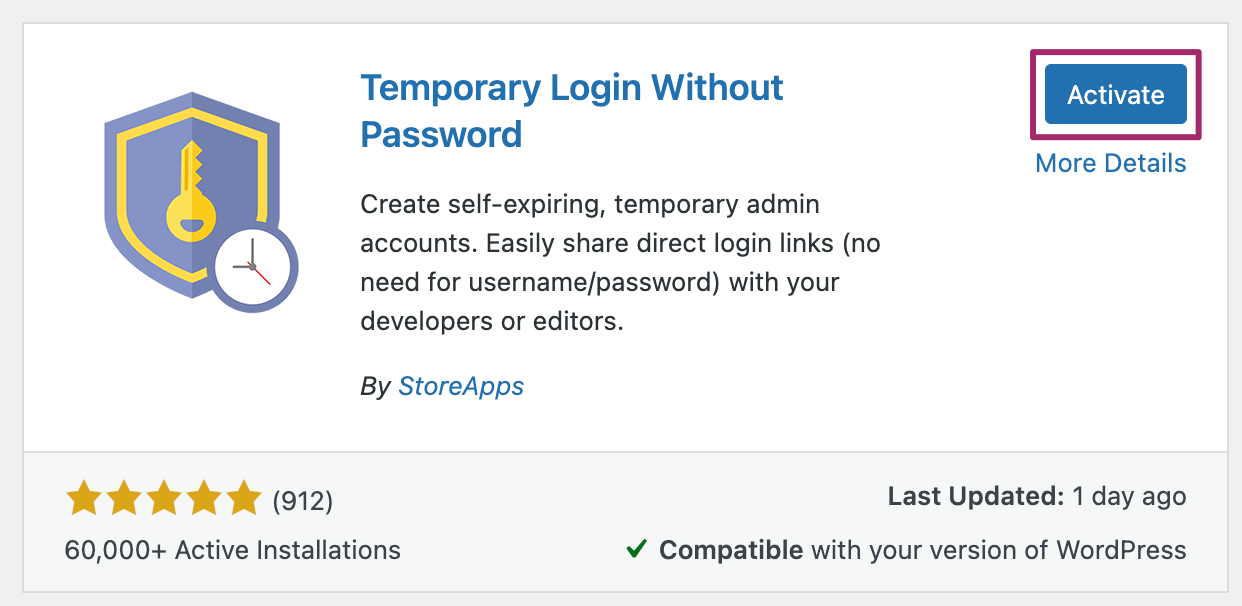
After installing, click the “Activate now” button as shown below.
- Go to the temporary logins settings
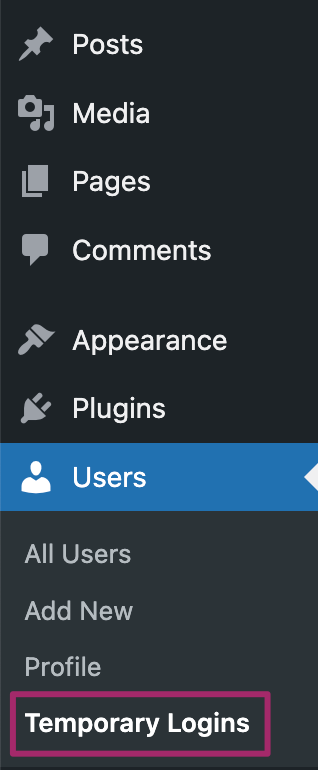
After activating, we can go to the temporary login settings. Navigate to Users -> Temporary Logins as shown below.
- Creating a new temporary login
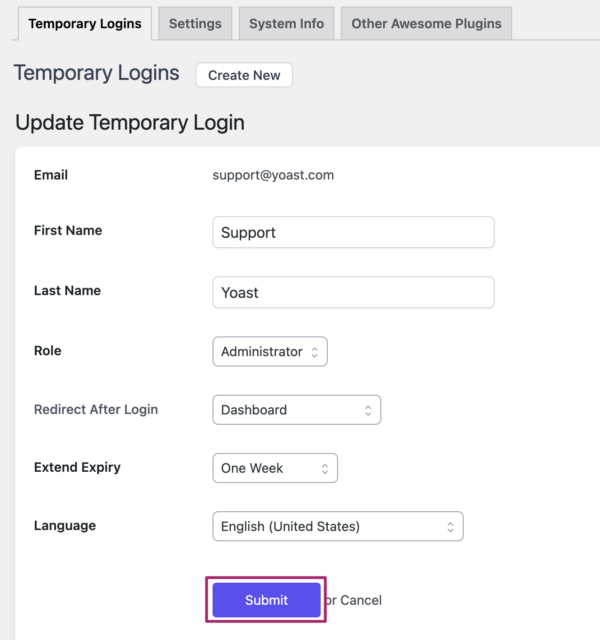
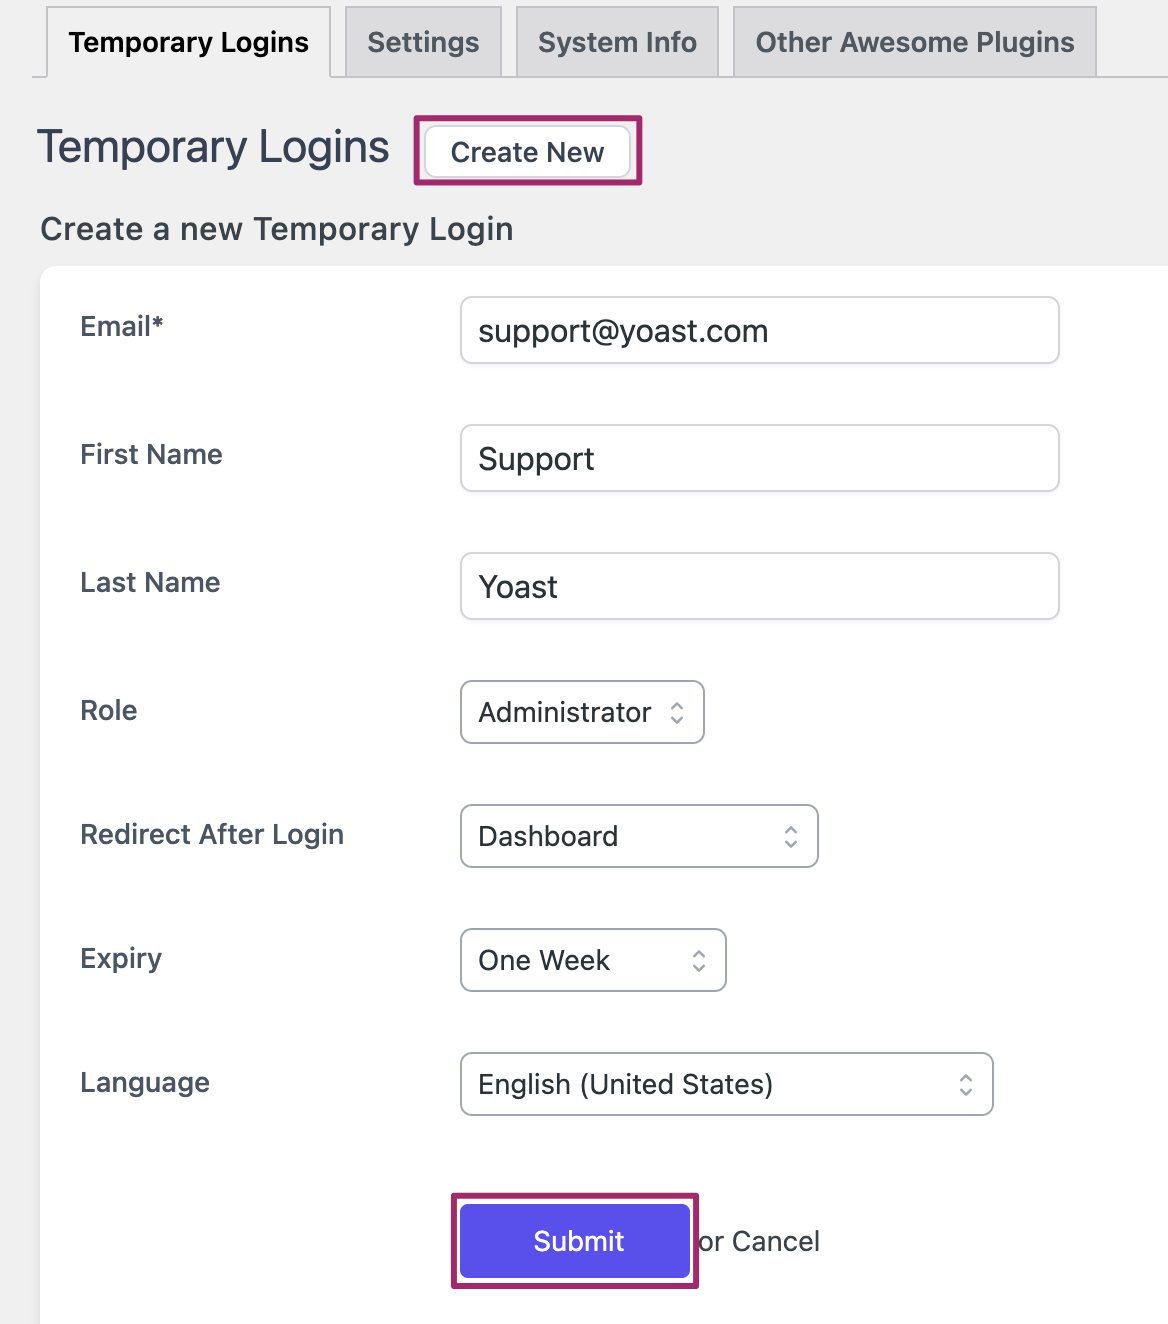
Click the “Create new” button first. Some entry fields show up. Fill out the email address as shown below. The role should be Administrator and the expiry can be set to one week (which is the default setting). Please set the Language to English (United States). After filling the form, you can click submit to complete the creation of a new temporary login.
- Copy the temporary login link
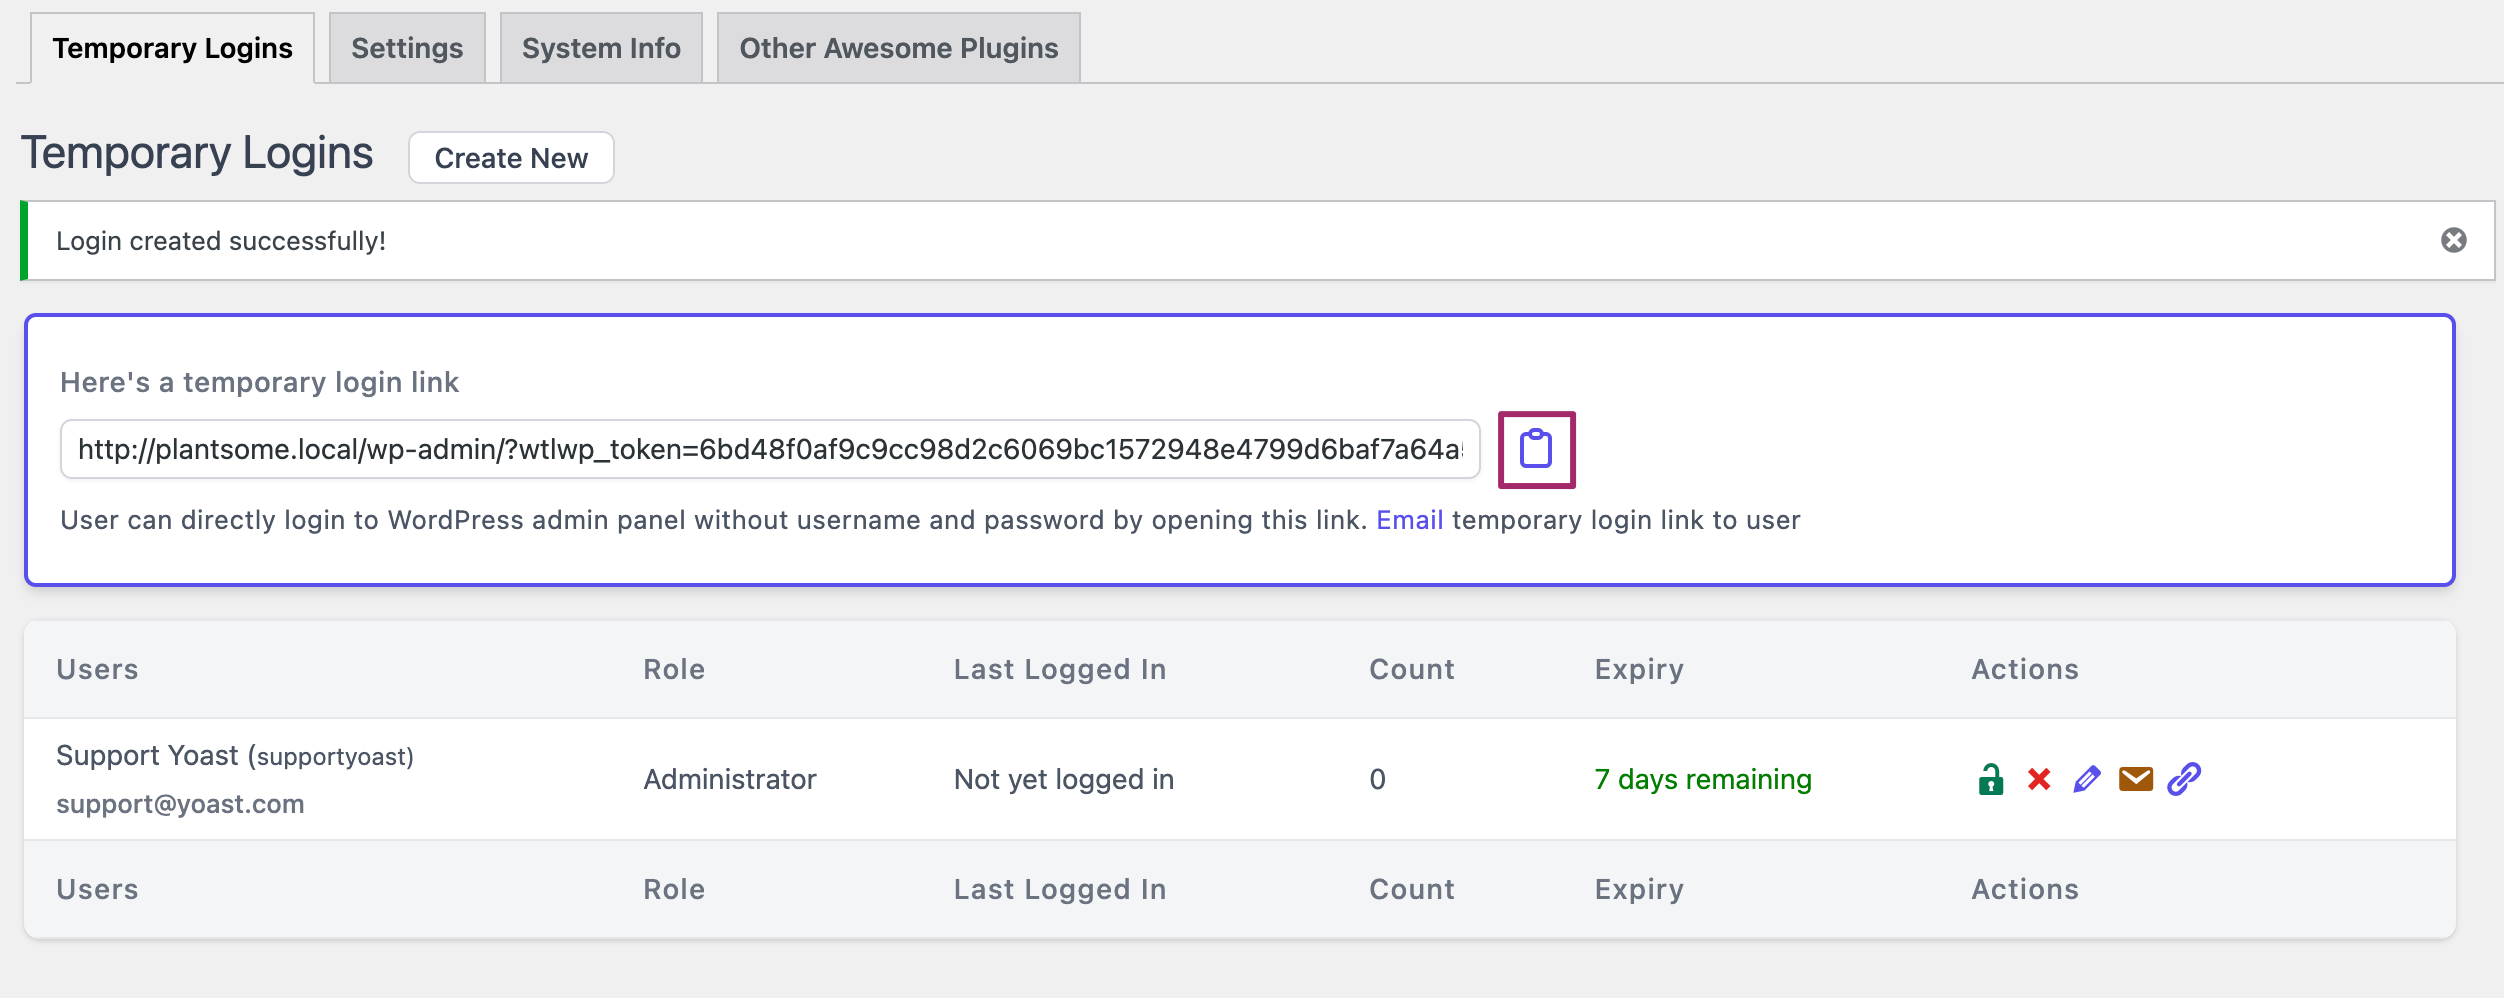
After submitting the form, please click the copy button and share the link with us. We’ll be able to log in without any passwords sent via email and the Admin account will be automatically removed after 1 week.
How to update the temporary login link
In some cases, you may need to change the user language or extend the expiration of a temporary login link.
- Log in to your WordPress website.
When you’re logged in, you will be in your ‘Dashboard’. - Go to the Temporary Logins settings.
Navigate to Users -> Temporary Logins as shown below.

- Edit the temporary user.
Under the actions column, click on the pencil edit icon.

- Make changes and click ‘Submit’.
You can change the name, role, or language for the user. The extend expiry drop-down allows you to change the time remaining and defaults to one week.
